Is It Flour Egg Then Panko? The Ultimate Guide To Mastering This Game-Changing Technique
Alright, let’s get this breaded party started! If you’ve ever wondered about the holy trinity of breading—flour, egg, and panko—you’re in for a treat. This isn’t just about throwing some random ingredients together; it’s an art form that can transform your cooking game forever. Is it flour egg then panko? Absolutely, but there’s so much more to uncover. So, buckle up because we’re diving deep into the world of breading perfection!
Now, let’s be real for a second. If you’ve ever bitten into a crispy, golden piece of chicken or fish and thought, “How do they make this magic happen?” the answer is simple: the flour-egg-panko method. It’s the secret weapon in every chef’s arsenal, and once you master it, your kitchen creations will never be the same again.
But hold up! There’s a lot more to this technique than just slapping some flour, egg, and breadcrumbs on your food. We’re talking about the science behind why this process works, how to tweak it for different dishes, and even some pro tips to take your breading skills to the next level. Ready to become a breading guru? Let’s do this!
- Brittney Griner A Journey Of Strength And Resilience
- Understanding Brittney Griners Gender Identity A Journey Of Authenticity
Table of Contents
- What Is It Flour Egg Then Panko?
- Why Does This Technique Work?
- The Ingredients You Need
- Step-by-Step Guide to Flour Egg Panko
- Panko vs Regular Breadcrumbs: What’s the Difference?
- Tips for Achieving Perfection
- Common Mistakes to Avoid
- Variations of the Flour Egg Panko Method
- Delicious Recipes to Try
- FAQ Section
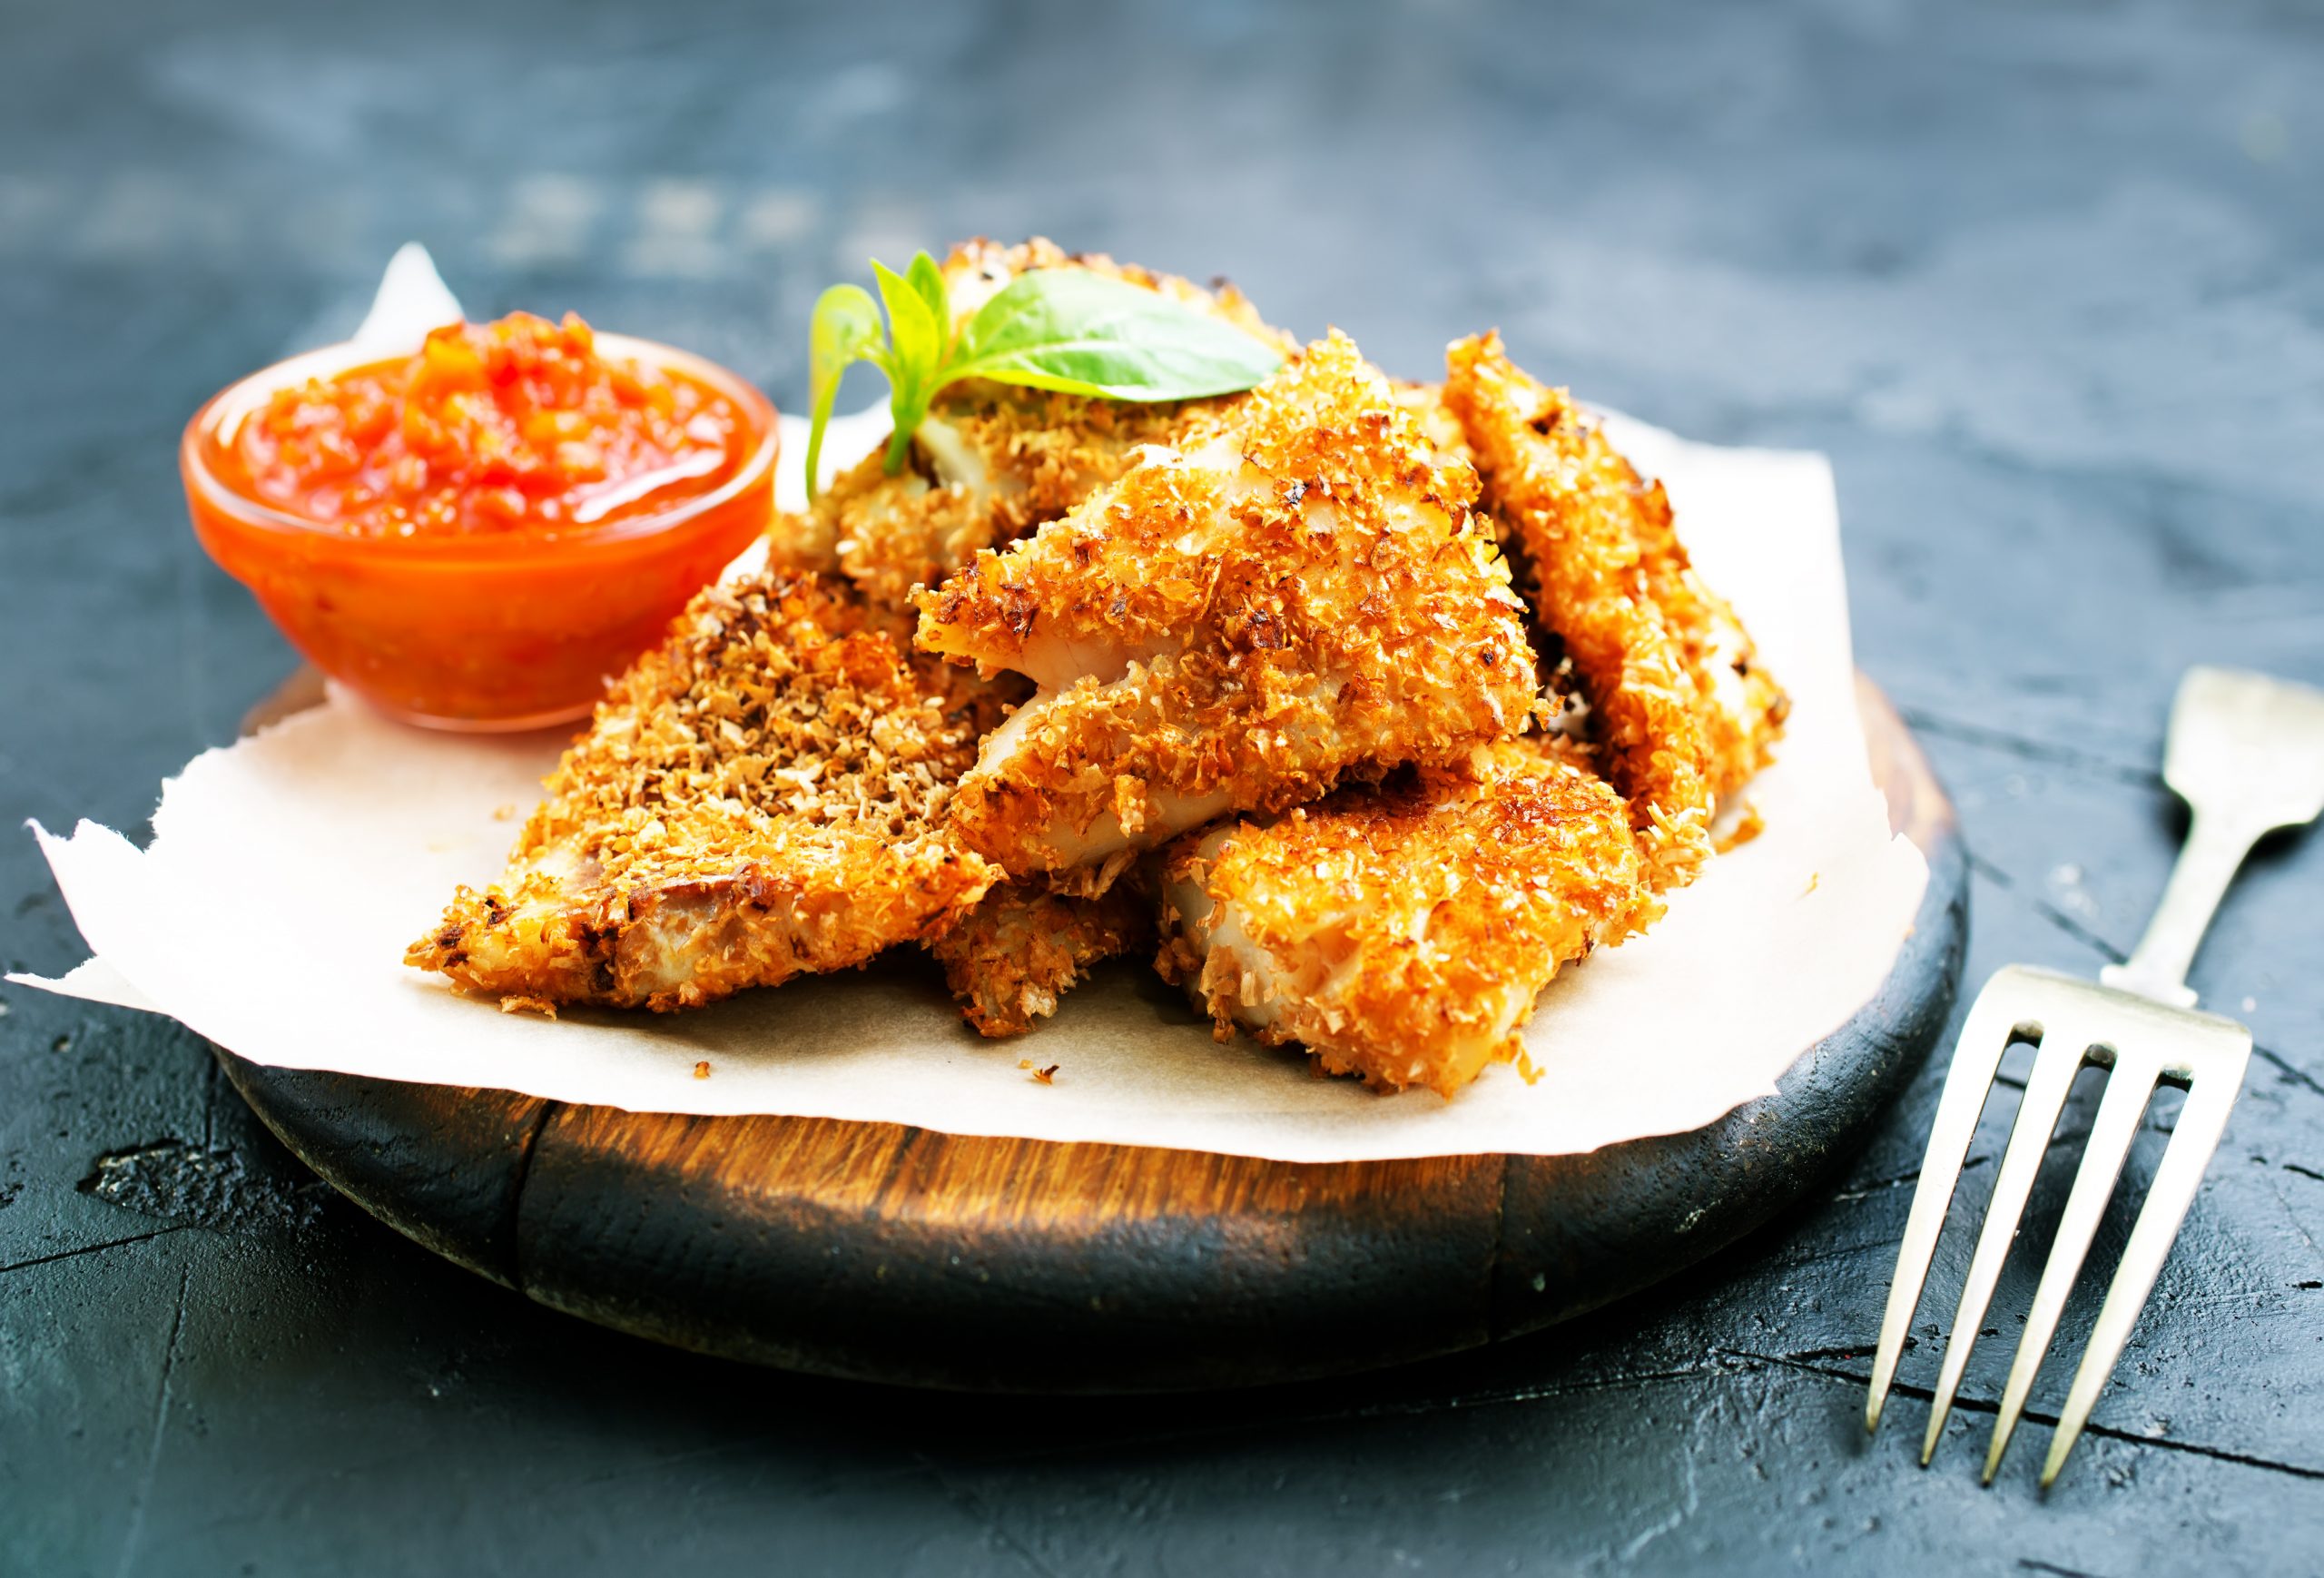
What Is It Flour Egg Then Panko?
Alright, let’s break it down. When people ask, “Is it flour egg then panko?” what they’re really asking is whether this specific sequence is the key to achieving that crispy, golden coating we all love. And the answer is a resounding yes! This method involves coating your food in flour, then egg, and finally panko breadcrumbs to create a perfectly crunchy exterior.
But why does this order matter? Well, each step plays a crucial role. Flour acts as a base layer, helping the egg stick. The egg serves as a binding agent, allowing the panko to adhere like a magnet. And panko? That’s where the magic happens. Its airy texture and larger flakes make it the ultimate breading for crispy goodness.
Why This Technique Is a Game-Changer
This technique isn’t just about breading; it’s about elevating your food to a whole new level. Whether you’re frying chicken, coating vegetables, or even making homemade pork chops, the flour-egg-panko combo ensures that your dish is both flavorful and satisfying. Plus, who doesn’t love the satisfying crunch of perfectly breaded food?
- Unlocking The Secrets Of Your Websites Performance With Google Ranking Checker Websites
- Discovering Your Digital Standing How To Check Ranking Of A Website
Why Does This Technique Work?
Science, my friend. Pure food science. Here’s the deal: when you coat your food in flour, you’re creating a dry surface that the egg can cling to. The egg, being sticky and gooey, acts as glue, holding everything together. Finally, the panko breadcrumbs lock it all in place, creating a barrier that protects the food inside while developing that golden, crispy crust when cooked.
Think of it like building a house. The flour is the foundation, the egg is the mortar, and the panko is the bricks. Without any one of these elements, your house—or in this case, your breading—wouldn’t stand a chance.
The Ingredients You Need
Now that we’ve covered the basics, let’s talk about what you’ll need to get started. Spoiler alert: it’s not rocket science. Here’s a quick rundown:
- Flour (all-purpose works best)
- Eggs (fresh and room temperature for optimal stickiness)
- Panko breadcrumbs (you can find these in most grocery stores)
- Your choice of protein or vegetable (chicken, fish, tofu, zucchini, etc.)
- Seasonings (salt, pepper, garlic powder, paprika—you name it!)
And that’s it! Simple, right? But don’t underestimate the power of quality ingredients. Fresh eggs and high-quality panko can make a world of difference in the final result.
Step-by-Step Guide to Flour Egg Panko
Ready to put this knowledge into practice? Follow these steps, and you’ll be breading like a pro in no time:
Step 1: Prep Your Stations
Set up three shallow bowls or plates. In the first, place your flour. In the second, beat your eggs and add a splash of milk or water for extra stickiness. In the third, pour your panko breadcrumbs.
Step 2: Coat Your Food
Start by lightly dusting your food in flour, shaking off any excess. Next, dip it into the egg mixture, making sure it’s fully coated. Finally, press it into the panko breadcrumbs to ensure a thick, even layer.
Step 3: Cook It Up
Whether you’re frying, baking, or air-frying, make sure your cooking method matches your desired level of crispiness. For extra crunch, try double-coating your food by repeating the flour-egg-panko process.
Panko vs Regular Breadcrumbs: What’s the Difference?
Here’s where things get interesting. While regular breadcrumbs can work in a pinch, panko is the superior choice for several reasons:
- Panko has a lighter, airier texture, which leads to a crispier coating.
- Its larger flakes help prevent sogginess, even after cooking.
- Panko absorbs less oil during frying, resulting in a healthier dish.
So, if you’re wondering whether to use panko or regular breadcrumbs, the answer is clear: go with panko every time. Trust me, your taste buds will thank you.
Tips for Achieving Perfection
Now that you’ve got the basics down, here are a few pro tips to take your breading game to the next level:
Tip 1: Season Everything
Don’t be shy with the spices! Season your flour, egg mixture, and panko breadcrumbs for added flavor. Garlic powder, onion powder, and smoked paprika are great places to start.
Tip 2: Use Fresh Ingredients
Fresh eggs and high-quality panko make a noticeable difference in the final result. Trust me, you’ll taste the difference.
Tip 3: Double-Coat for Extra Crunch
If you want that restaurant-quality crunch, try double-coating your food. It might take a little extra time, but the results are worth it.
Common Mistakes to Avoid
Even the best chefs make mistakes sometimes. Here are a few pitfalls to watch out for:
- Not shaking off excess flour, which can lead to a gummy coating.
- Skipping the egg step, which compromises the breading’s ability to stick.
- Using stale panko, which won’t crisp up properly.
By avoiding these common mistakes, you’ll be well on your way to breading perfection.
Variations of the Flour Egg Panko Method
Once you’ve mastered the basics, feel free to experiment with different variations. Here are a few ideas to get you started:
Variation 1: Add Cheese
Mix grated Parmesan or Pecorino into your panko for an extra cheesy kick.
Variation 2: Use Different Breadcrumbs
Try using crushed cornflakes or crushed crackers for a unique texture.
Variation 3: Experiment with Proteins
Don’t limit yourself to chicken or fish. Tofu, tempeh, and even vegetables like zucchini and eggplant can all benefit from the flour-egg-panko treatment.
Delicious Recipes to Try
Now that you’ve got the technique down, here are a few recipes to put it into practice:
Recipe 1: Crispy Panko Chicken
A classic for a reason, this dish is perfect for any occasion. Simply follow the flour-egg-panko method, then fry or bake until golden brown.
Recipe 2: Panko-Crusted Fish Tacos
Take your taco game to the next level with crispy, panko-coated fish. Serve with fresh slaw and a tangy avocado crema for a delicious twist.
Recipe 3: Baked Panko Zucchini Sticks
A healthier option that’s still packed with flavor, these zucchini sticks are a great appetizer or side dish.
FAQ Section
Got questions? We’ve got answers. Here are a few common queries about the flour-egg-panko method:
Q: Can I use regular breadcrumbs instead of panko?
A: Yes, but keep in mind that panko will give you a crispier result.
Q: Do I have to use eggs?
A: Eggs are the best binding agent, but you can use milk or even a cornstarch slurry as a substitute if needed.
Q: Can I freeze breaded food?
A: Absolutely! Breaded food freezes beautifully and can be reheated in the oven or air fryer for maximum crispiness.
Kesimpulan
So, there you have it—the ultimate guide to mastering the flour-egg-panko method. Whether you’re a seasoned chef or a kitchen newbie, this technique is sure to elevate your cooking skills to new heights. Remember to season generously, use fresh ingredients, and don’t be afraid to experiment with different variations.
Now, it’s your turn to take the reins and start creating some breading magic. Share your favorite recipes in the comments below, and don’t forget to tag us in your culinary adventures. Happy cooking, and remember: is it flour egg then panko? Yes, and it’s absolutely worth it!
- Understanding Your Websites Google Ranking
- Evaluating Your Digital Presence How To Check Website Rating

Cod fillets are first dipped in flour, then egg, followed by a seasoned

Panko, Japanese Style Bread Crumbs Stock Photo Image of breaded
Parmesan Panko Fish Anchor Caribbean
